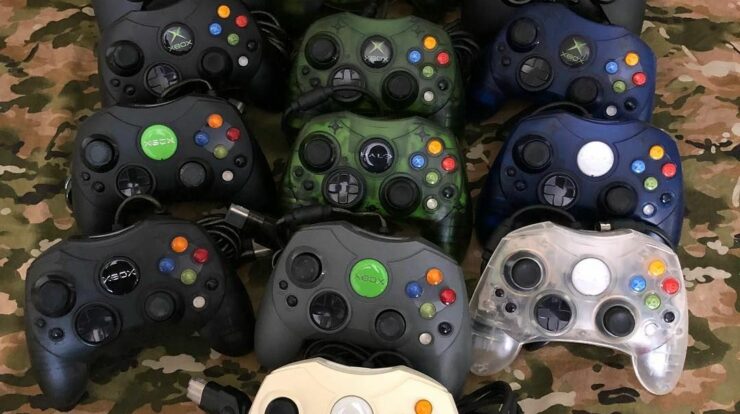
How to Connect Xbox One Controller Wireless For Games 2023? Lets discuss! It takes a bit more than simply connecting your Xbox One controllers in to make them operate with your game console these days. How to connect xbox controller to xbox one x? Fortunately, console manufacturers have simplified the process of synchronizing wireless controllers.
However, that does not imply that there aren’t any problems with wireless controllers. Xbox One synchronization is simple; however, there are several troubleshooting options available if your Xbox wireless controller isn’t working properly. Here’s all you need to know to resolve any potential issues and synchronize your Xbox One with your controllers. We also offer a tutorial on syncing your Xbox controller with your PC.
How to Connect Xbox One Controller For Games 2023?
Turning on your controller is necessary for syncing it. Although AA batteries are required for Xbox One controllers, rechargeable battery packs are also available. In any case, check that your controllers have adequate power before attempting to pair them; difficulties that appear to be related to connection are sometimes caused by insufficient power.
Step 1: Press the Xbox button in the middle of the device to switch it on after charging the Bluetooth controller or installing new batteries. As soon as it is turned on, it will light up. After that, press the Xbox console’s power button.
Step 2: You must enable the connection on both the controller and the console in order to link your controller with your Xbox One. Find the console’s connection button first. This button is located next to the disc tray on the left side of the original Xbox One console.
Step 3: The connection button is located under the power button in the lower right corner of the front of the Xbox One X and Xbox One S consoles. The Xbox logo, which is white and blinks to indicate that the console is looking for a controller signal, should blink when you press the button.
Step 4: Press the black Connect button on the top side of the controller to initiate a controller connection. You have 20 seconds after pressing the Xbox One’s Connect button. While they are attempting to connect, the Xbox logos on the controller and the console will flicker. Both logos will solidify when they locate one another, signifying that the controller and console have synchronized.
Step 5: Repeat the procedure with as many controllers (up to 8) as you like to sync with the Xbox.
Make Your Controller Profiles Unique.
You may observe what occurs when you switch on a controller once it has synchronized with your console. To access the Settings menu, press the gear symbol after pressing the Xbox button on the controller to display the main menu. Locate devices and Kinect, then use that location to locate your controllers. After syncing, you can adjust the profiles that each controller signs in to when you switch it on from the Controller menu. You can also adjust security settings to limit who may sign in to multiple Xbox accounts.
Employ a USB cord.
Xbox controllers don’t have to be used wirelessly, nor do you have to use a lot of batteries if you don’t have rechargeable ones. Additionally, you may use cords to hook them into your Xbox One. This will sync them to your console, so it could be simpler to use a USB cord if you’re experiencing problems synchronizing wirelessly. You may connect your controller straight to the console by inserting a Micro-B USB cable into it. You won’t need batteries or a rechargeable battery pack because the cable can power the now-wired controller. You can still adjust controller settings via the controller menu.
Troubleshooting
Option No 1:
The internal software of your controller may be outdated if you’re experiencing connectivity issues. To fix some problems, you can upgrade the firmware on your Xbox One console. Navigate to the Settings, Kinect, and Devices menus. From there, choose each controller you have attached, whether it is wirelessly connected or via a USB port. Choose the ellipses under the Controller button after selecting the controller you wish to change from this menu. This will bring up a menu where you may check for firmware upgrades, which may resolve your problems.
Option No 2:
It’s time to troubleshoot additional options if you’ve tried everything else, including checking for dead batteries, and your Xbox One controllers are still not connecting. Interference in your play environment, whether it comes from other gadgets, walls, or something unexpected like radio or microwave interference, is one of the most frequent competitors for this.
Making sure you’re close enough to your Xbox One is the first step. This is significant since the range of your controller is limited to 19 to 28 feet. It is more probable that you will experience connection issues if you attempt to play from a significantly greater distance.
Next, take note of any obstacles that could be preventing the connection between your controller and the wall. Walls, furniture, and even extra gadgets you’ve hooked into your Xbox One are examples of these obstructions. As much as possible should be done to remove obstructions, as they might deteriorate your signal.
Make sure your controller and console are free of any metal objects. These kinds of things might weaken your signal. The final piece of advice is to restart your console to start over from scratch. Try all of these solutions, and if connectivity issues persist, visit Microsoft’s support page for more advice or think about getting a new controller.
We really hope that this tutorial was useful and that you’re now prepared to explore the whole library of Xbox One titles.